20% Discount for Veterans, First Responders & their Families

Step-by-Step Process of Professional Water Filtration Installation: From Novice to Expert

TL;DR: This guide covers the importance of installing a water filtration system in your home, especially in places like Arizona where water hardness is a concern. With up to 45% of US tap water containing ‘forever chemicals’, having a filtration system is crucial. Key points include choosing the right installation spot, ensuring accessibility and space, preparing with the necessary tools, and following a step-by-step installation process. Post-installation, it’s vital to flush the system, check for leaks, and regularly replace filters. For professional installation, Semper Fi Heating & Cooling offers expert services in Arizona.


Turning on your kitchen tap and seeing pure, soft water flowing out can make you feel confident you’re safeguarding your family’s health. However, the latest tests suggest that at least 45% of US tap water contains ‘forever chemicals’. 

Besides, in Arizona, water hardness levels can climb as high as 20 GPG, so naturally, you want to change this. A water filtration system comes up as an excellent solution. Still, expert guidance is vital as more households seek to enhance their water quality through reverse osmosis, water softening, and carbon filtering.

In this article, you’ll learn how to choose the perfect spot for your system and master installation techniques involving copper pipes and specialized plumbing tools. 

Choosing the Right Spot for Your Water Filtration System

First, when preparing for the installation of the filtration system, you must decide where to place it. This will affect how well it works and how easy it is to maintain.

Accessibility Considerations

When selecting the ideal location for your water filtration system, ensuring easy access is crucial for ongoing maintenance and efficiency. Choose a spot where you can easily access the filter for maintenance and replacements. 

Space Requirements

Available space is a significant factor in deciding where to install your water filtration system. Ensure there is enough room to accommodate the unit and any associated components, such as the mineral tank and pressure tank. It’s typically advisable to install the system in a utility room or basement, where there is sufficient space and easy access to water and electrical outlets.

Proximity to Main Water Shut-off Valve

Ideally, install your water filtration system in close proximity to the main shut-off valve. This location minimizes the need for extensive plumbing modifications and ensures that all water entering your home is processed through the filter. This valve is usually placed in the basement or a utility closet outside the house. If such a spot isn’t available, a vertical pipe section can be modified to create a suitable installation point.

Preparing for Installation

Proper preparation ensures a smooth installation. Let’s examine what you need to do.

Tools and Materials Needed

When installing the water filter, you must gather all the necessary tools and materials. You will need a table or stool to support the unit while attaching it to the wall, a tech gun for securing the unit with tek screws, and a drill for creating pilot holes. 

Bolts, a level, and a plumber’s thread tape are essential for ensuring the unit is securely and properly installed. Additionally, steel nipples, a crescent tool for tightening, a pencil, measuring tape, a water filter housing tool, grease, and a hacksaw for cutting a 3/4-inch pipe are required. Having these tools at hand makes the installation process easier and quicker.

Shutting Off the Water Supply

The main water supply needs to be switched off. This can often be done by locating the main water shut-off valve near your water meter, which can be a ball valve or an angle stop valve. 

Turn the valve handle or wheel to the right to stop until the water flow stops. If you’re working on a specific fixture, you might only need to shut off the water supply to that fixture using its own valve, which is located behind or beneath it and has a handle or knob.

Draining the System

After turning off the water supply, if your house has a drain valve just after the shut-off valve, connect a hose to it and drain the system into a sink, a bucket, or outside. Opening a fixture on the upper floor will help ensure all the water drains out. This step is key to avoiding water spillage when cutting into pipes during the installation process.

Step-by-Step Installation Process

It’s important to follow the steps of the process correctly. This ensures your water filtration system will not show signs of a problem as soon as you finish your work.

Removing a Section of Pipe

Use a pipe cutter to carefully cut out the marked section of pipe designated for your filtration system. Precise removal is crucial to ensure proper alignment of the new fittings. Place a bucket to protect from water spills.

Installing Tees and By-Pass Shut-Off Valve

After removing the necessary section of pipe, proceed to install copper tees on each side of the cut. These tees will serve as connection points for the by-pass shut-off valve, essential for maintenance and filter replacement without disrupting the water supply. The by-pass valve needs to be in the open position before you continue.

Adding Shut-Off Valves

For added convenience and safety, install shut-off valves on either side of the filtration system. This allows you to easily control water flow when servicing the system. Ensure these valves are accessible and properly aligned with the rest of the plumbing.

Soldering the Connections

Prepare the connections by cleaning and deburring the cut pipe ends. Apply flux to the inside of the fittings and the outside of the pipe before heating them with a propane torch. Once hot enough, apply lead-free solder to create a watertight seal. Remember to solder fittings before attaching them to the filter to avoid damaging internal components.

Attaching Grounding Jumper Cable

If your home uses metal water pipes as the electrical ground, it’s crucial to maintain this grounding path. After installing the water filter, attach grounding clamps to the metal pipe on either side of the filter. Secure a length of heavy-gauge copper wire between the clamps to maintain proper grounding of the electrical system.

Post-Installation Testing 

Test your work to see if it was successful. If it doesn’t go well, you should be prepared to reevaluate your work.

Flushing the System

After successfully installing your water filtration system, the first step in ensuring its effectiveness is flushing the system. Run the system for a few minutes, then check the water quality to ensure it meets safety standards. This step is important for both whole-house systems and under-sink filters to guarantee the purity of your water.

Checking for Leaks

Once the system has been flushed, it’s important to check for any leaks in the plumbing connections. See if you can find signs of dripping and damage. Ensuring all connections are secure and leak-free is essential to maintain the integrity of your water filtration system and prevent potential water damage.

Replacing Filters

The filters within your water filtration system play a significant role in purifying your water and must be replaced periodically. How frequently you replace your filters depends on the type of system and the quality of the water being filtered. Regular filter replacement is vital to sustain the system’s efficiency and ensure the continued provision of clean, safe drinking water.

Professional Water Filtration Installation in Arizona

This article provides a guide to the step-by-step process of professional water filtration installation, ensuring clean and safe drinking water for your home. If you want things done right, however, call in the professionals.

At Semper Fi Heating & Cooling, we offer quality services in water filtration installation, HVAC systems, and plumbing solutions, providing the best assistance in the region. Don’t wait to improve your water quality—call us now to schedule your installation and experience the best in-home service solutions.

Step-by-Step Guide: How to Apply Plumbing Tape Correctly

Applying plumbing tape correctly is crucial for preventing leaks and ensuring a secure fit between pipe connections. Follow our guide for the right techniques and common pitfalls to avoid. If complications arise, don’t hesitate to hire a professional plumber to guarantee the safety and integrity of your plumbing repairs.

Plumbing tape, often overlooked, is a small yet mighty tool in the arsenal of DIY plumbing repairs. This thin, adhesive material plays a pivotal role in sealing pipe threads, preventing leaks, and ensuring a tight connection between fittings. Plumbing tape is an excellent tool for creating secure, leak-free connections in your plumbing projects, ensuring a job well done with minimal fuss. However, if the task at hand becomes too complex or if unexpected issues arise, don’t hesitate to call in a professional plumber to ensure the integrity of your plumbing system and peace of mind.

While the process of applying plumbing tape might seem straightforward, there’s an art to it—a few wraps too many or too few, or even in the wrong direction, can mean the difference between a watertight seal and a problematic leak. In this guide, we’ll dive deep into the correct way to apply plumbing tape, addressing common misconceptions and offering a step-by-step approach to mastering this essential plumbing skill.

Whether you’re a seasoned DIY enthusiast or a beginner, understanding how to apply plumbing tape properly can save you from potential water damage and costly repairs. And remember, while DIY solutions are effective for minor fixes, the complexity of plumbing systems often requires the expertise of a professional plumber to ensure the job is done right and your home is protected.

What is Plumbing Tape?

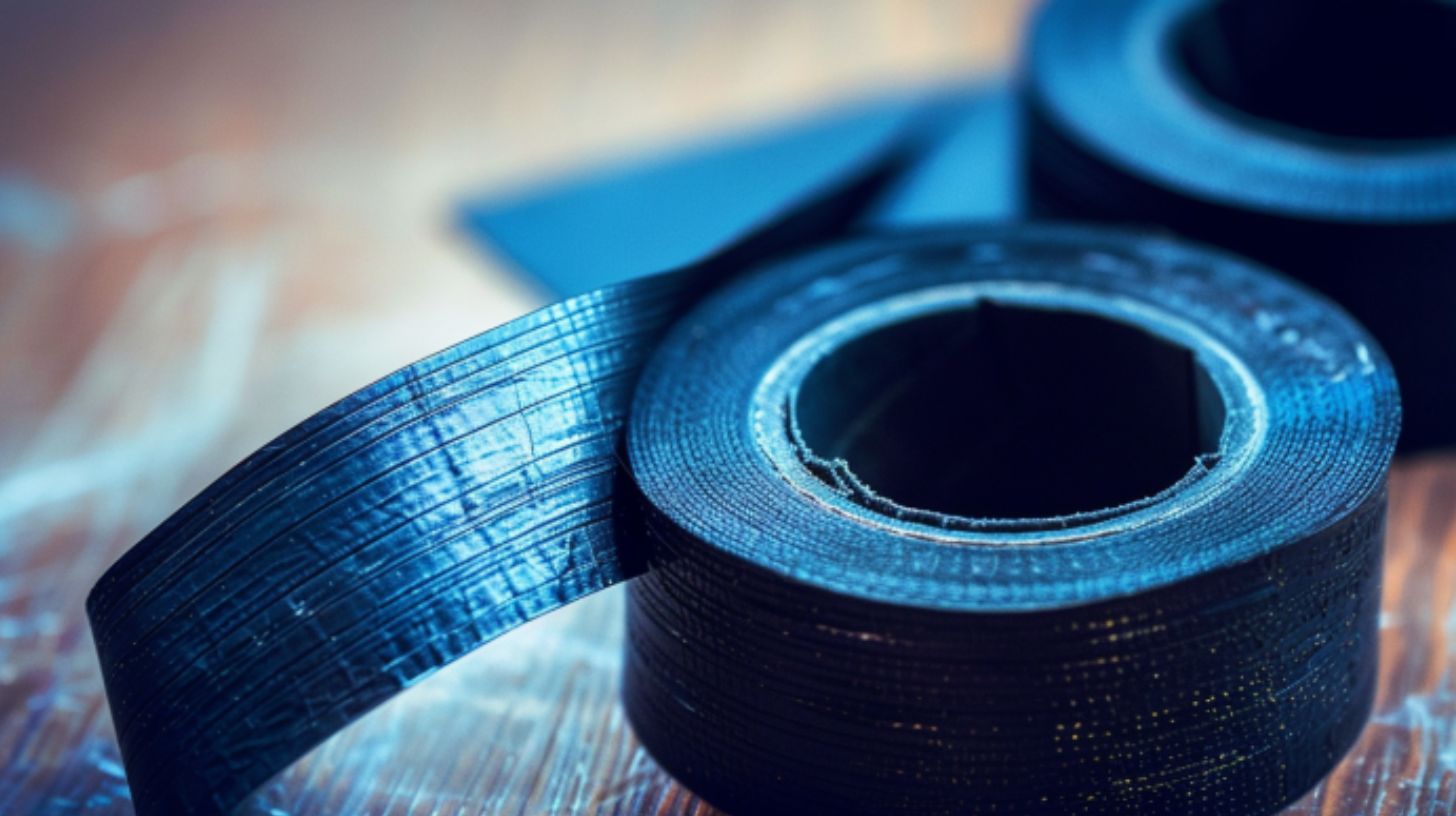
Plumbing tape, commonly referred to as Teflon tape, thread seal tape, or PTFE tape, is a specialized tape used to seal pipe threads in plumbing connections. This tape is made from polytetrafluoroethylene (PTFE), a material known for its low friction and excellent chemical resistance, making it ideal for creating airtight and watertight seals in a wide range of piping systems.

Unlike traditional adhesive tapes, plumbing tape doesn’t actually adhere to the surfaces it’s applied to; instead, it fills in the gaps between threaded pipe connections, preventing water, gas, or air from leaking out. Its versatility makes it a staple in both professional plumbers’ toolkits and home repair kits alike, suitable for use with metal, plastic, and various other pipe materials.

The effectiveness of plumbing tape lies not just in its material properties, but also in its application technique. When wrapped correctly around the threads of a pipe or fitting, the tape compresses and forms a seal as the connection is tightened. This seal can withstand a wide range of temperatures and pressures, making it invaluable in both simple home repairs and complex industrial applications.

Additionally, plumbing tape can prevent the binding or seizing of threads, facilitating easier disassembly and reassembly if modifications or repairs are needed in the future. Despite its simplicity, the correct use of plumbing tape can dramatically extend the lifespan of plumbing systems and reduce the likelihood of leaks and damage.

Tools and Materials You’ll Need To Apply Plumbing Tape

To successfully apply plumbing tape, a few essential tools and materials are required. Firstly, you’ll need the appropriate type of plumbing tape, such as Teflon, PTFE, or thread seal tape, selected based on the pipes’ material and the fluid or gas they’ll carry. Before starting, a clean cloth is necessary to wipe down the threads of the pipe or fitting, ensuring they’re free of any debris, grease, or remnants of old tape. For cutting the tape, have a utility knife or a pair of scissors on hand to achieve a clean cut, which helps in applying the tape smoothly.

Although not directly involved in applying the tape, a wrench may be needed for adjusting the connections before and after the tape application. Optionally, wearing gloves can keep your hands clean and provide a better grip during the process. By gathering these items beforehand, you can ensure a streamlined and efficient application, minimizing potential issues and ensuring a leak-proof seal.

Step-by-step Guide to Applying Plumbing Tape

Applying plumbing tape is a simple yet precise task. Taking the time to do it right can prevent leaks and extend the lifespan of your plumbing connections. If you encounter any issues or if the task seems daunting, don’t hesitate to contact a professional plumber. Their expertise can save you time and ensure your plumbing is leak-free and properly maintained.

Prepare The Threads

First, prepare the threads by thoroughly cleaning them with a clean cloth. It’s crucial to remove any dirt, old tape, or debris to ensure the new tape adheres properly and creates a tight seal. Take a moment to inspect the threads for any damage or wear. Damaged threads may need to be replaced or repaired before proceeding to ensure a successful application.

Measure & Cut Tape

Next, measure the amount of tape needed by holding the end of the plumbing tape against the base of the pipe thread and wrapping it around once lightly. This gives you an idea of the length required to wrap around the thread typically 3-6 times, depending on the size and type of connection. Once measured, cut the tape cleanly using a utility knife or scissors. A clean cut prevents fraying and helps in smooth application.

Apply The Tape

The actual application involves wrapping the tape around the pipe’s threads. Begin by securing the end of the tape at the base of the thread and wrap it tightly in a clockwise direction. This direction ensures that the tape will tighten onto the threads as you screw the connection together, rather than unraveling. Make sure to overlap each wrap slightly, covering all threads without leaving gaps or bulges. The goal is to form a uniform layer that’s neither too thick nor too thin.

Finalize the Application

After wrapping, press down on the tape to ensure it’s seated firmly into the threads. This step is crucial for removing any air pockets and ensuring a seamless seal. Finally, reattach your fitting or connect your pipe, using a wrench if necessary to tighten the connection. It’s important not to over-tighten, as this can strip the threads or damage the seal you’ve just created.

Common Mistake to Avoid

Avoiding common mistakes when applying plumbing tape is key to ensuring a durable and leak-proof seal. Here are some pitfalls to watch out for:

Applying the Tape in the Wrong Direction: One of the most frequent errors is wrapping the tape in a counterclockwise direction. Always wrap the tape clockwise around the threads. This aligns with the direction you’ll screw the pipe or fitting into, preventing the tape from unraveling or bunching up, which could compromise the seal.

Using Too Much or Too Little Tape: Finding the balance in the amount of tape used is crucial. Too little tape may not cover all the threads, leading to potential leaks. Conversely, too much tape can make it difficult to screw the parts together properly and might even cause the threads to cross or strip. Typically, 3-6 wraps are sufficient, but this can vary based on the thread size and type.

Not Cleaning the Threads Thoroughly: Failing to clean the threads before applying new tape can result in a poor seal. Any residue, dirt, or remnants of old tape can prevent the new tape from adhering properly, leaving gaps for leaks to develop. Always start with a clean surface for the best results.

Overlooking Damaged Threads: Attempting to apply plumbing tape to damaged or worn threads is a futile effort. Inspect the threads carefully before application; if they’re damaged, it’s often best to replace the part. Applying tape to compromised threads may temporarily stop a leak but can lead to more significant issues down the line.

Neglecting to Press the Tape into the Threads: After wrapping, some might forget to press the tape into the threads firmly. This step is essential for removing any air pockets and ensuring the tape molds to the shape of the threads, creating a seamless and effective seal.

By steering clear of these common mistakes, you can enhance the effectiveness of your plumbing tape application, ensuring a strong, lasting seal that holds up against pressure and wear.

Professional Plumbing Services Near You

Remember, while applying plumbing tape is a task many can accomplish with a bit of practice, there’s no substitute for professional expertise when facing more complex plumbing challenges. If you ever find yourself in doubt or dealing with a situation that seems beyond your skill level, don’t hesitate to call in a professional plumber. Their experience and knowledge can not only fix the issue at hand but also prevent future problems, ensuring your plumbing system operates smoothly and efficiently.

If you’re in Phoenix and find yourself in need of professional plumbing services, look no further than Semper Fi Heating & Cooling. Not only are we the top-rated Heating & Cooling Company in Phoenix, we also specialize in Plumbing Services to ensure your home has everything it needs to run smoothly. Whether you’re dealing with a tricky leak that requires a skilled hand or planning a major plumbing overhaul, Semper Fi is your go-to source for reliable, efficient, and high-quality service.

Frequently Asked Questions About Plumbing Tape

Can I use any type of plumbing tape for all pipe materials?

Different types of plumbing tape are better suited for different materials. Teflon or PTFE tape is the most versatile and can be used on a wide range of pipe materials including metal and plastic. Always check the manufacturer’s recommendations for the tape to ensure compatibility with your pipe material.

How do I know if I’ve applied enough plumbing tape?

The general rule of thumb is to wrap the tape around the thread 3-6 times, ensuring that it’s snug but not overly tight. The tape should cover all threads without bulging or overlapping excessively. After applying, the threads should still be visible through the tape. If you’re unsure, it’s better to err on the side of caution and hire a professional plumber.

Why do I need to wrap the tape in a clockwise direction?

Wrapping the tape clockwise ensures that when you screw the pipe or fitting into place, the motion tightens the tape around the threads rather than unravelling it. If wrapped counterclockwise, the tape may bunch up or come loose as you tighten the connection, which can compromise the seal.

How To Choose a Plumber in Phoenix

The best way to choose the right plumber in Phoenix is by understanding your specific plumbing needs, researching qualified professionals, evaluating their experience, and reading through recommendations and reviews.

Are you a homeowner in need of Plumbing Services in Phoenix? Choosing the right plumber in Phoenix is more than just a convenience—it’s a necessity for maintaining the health and safety of your home. With Phoenix’s unique challenges, including its hard water and the potential for heat-related pipe issues, finding a plumber who is not only skilled but also well-versed in local conditions is crucial.

This blog will guide you through understanding your specific plumbing needs, researching and evaluating local plumbers based on their qualifications and experience, and making an informed decision with the help of reviews and recommendations. Whether you’re dealing with an emergency leak or planning routine maintenance, this comprehensive guide is designed to ensure you have all the information you need to choose the best plumbing professional for your situation.

Understanding Your Plumbing Needs

Have you ever looked for a plumber and just don’t know where to begin? Before embarking on your search for the right plumber in Phoenix, it’s crucial to understand the specifics of your plumbing dilemma. The city’s unique plumbing challenges, such as hard water scale buildup and the thermal expansion and contraction of pipes due to extreme temperatures, necessitate a keen awareness of potential issues. Assessing the urgency is also vital; immediate action is required for leaks to avoid water damage, whereas a slow-draining sink may not demand as prompt attention.

Understanding the scope of your plumbing problem is equally important. Is it an isolated issue, or does it indicate a systemic problem throughout your home? This assessment will influence the level of expertise needed for the job. Moreover, consider carefully whether the issue is within your DIY capabilities or if it warrants the knowledge and tools of a professional. Many plumbing tasks in Phoenix, with its specific challenges, are best handled by professionals. By comprehensively evaluating your situation, you can better communicate with potential plumbers, ensuring you seek the appropriate services for a timely and effective solution.

Recommendations and Reviews

If you aren’t sure where to look to begin your research for a reliable plumber in Phoenix, you can’t go wrong with word-of-mouth referrals or online searches. Platforms such a Google, Yelp, Directories, and the BBB can be goldmines of information, providing insights into a plumber’s services, availability, and most importantly, customer feedback.

In addition to online resources, don’t underestimate the power of word-of-mouth referrals from friends and family. Those who have had positive experiences with plumbers can provide invaluable insights into their reliability, work ethic, and the quality of their service. This personal touch adds another layer of trust and assurance in your selection process.

Additionally, local listings tailored to the Phoenix area can highlight professionals experienced in tackling the region’s specific plumbing challenges, such as hard water effects or temperature-related pipe issues. This step is crucial for compiling an initial list of plumbers who not only offer the required services but also understand the intricacies of plumbing in Phoenix.

By combining detailed online research with the trusted opinions of your personal network, you’re better positioned to choose a plumber who is not only highly qualified but also comes with a stamp of approval from those whose opinions you value.

Qualifications and Experience

When narrowing down your list of potential plumbers in Phoenix, you should consider both their qualifications and their experience. In Arizona, plumbers are required to hold a specific license to legally perform plumbing work, which ensures they have met certain training and proficiency standards. You shouldn’t work with a company that does not have necessary licenses.

Beyond licensing, look for additional certifications or specializations that might be particularly relevant to your needs, such as expertise in water treatment systems or experience with energy-efficient appliances. These qualifications are indicative of a plumber’s commitment to their craft and their ability to stay abreast of the latest technologies and methods in plumbing.

A plumber’s history of working in Phoenix is invaluable, especially given the city’s unique environmental conditions that can affect plumbing systems, like extreme temperatures and hard water. An experienced local plumber will not only be familiar with these specific challenges but will also have a proven track record of successfully addressing them. Combining a thorough evaluation of a plumber’s qualifications with a deep dive into their experience ensures you select a professional who is well-equipped to provide high-quality, reliable solutions.

Key Considerations When Choosing a Plumber in Phoenix

Beyond the foundational aspects of reviews, referrals, and licensing, several other critical factors must be taken into account when selecting a plumber in Phoenix. One of the primary considerations is availability. Given the potential for plumbing emergencies to occur at any hour, it’s important to choose a professional who offers flexible scheduling and emergency services. A plumber’s ability to provide swift response times can be the difference between a minor issue and extensive water damage. This is particularly crucial in Phoenix, where the heat can exacerbate plumbing problems quickly.

Communication is another essential factor. A reliable plumber should be transparent and clear in their communication, providing detailed explanations of the problem, the proposed solution, and the associated costs. This includes offering accurate estimations that cover the scope of the work, the time frame for completion, and a breakdown of materials and labor costs. Be wary of plumbers who provide vague estimates or avoid answering questions directly.

Good communication also means that the plumber is willing to listen to your concerns, answer your questions comprehensively, and keep you informed throughout the repair or installation process. Ultimately, choosing a plumber who values transparency and open dialogue will ensure that you’re fully aware of what the job entails, leading to fewer surprises and a more satisfactory outcome.

Professional Plumbers Near You

When it comes time to find a Plumber to trust for your plumbing needs in Phoenix, it’s important that you feel comfortable with the company performing the services. Choosing the right plumber in Phoenix goes beyond simply picking a name out of a directory; it requires a careful consideration of various factors, including but not limited to qualifications, experience, availability, response times, and communication skills. Remember, the goal is to find a plumbing professional who not only meets your immediate needs but can also be relied upon for future maintenance and emergencies, ultimately fostering a trustworthy and lasting relationship.

In your search for a reliable and experienced plumbing and HVAC service provider in Phoenix, consider Semper Fi Heating & Cooling as your go-to solution. Renowned for their commitment to excellence and customer satisfaction, Semper Fi stands out with their team of highly qualified technicians who are not only adept at addressing Phoenix’s unique plumbing challenges but also excel in heating and cooling services, ensuring your home remains comfortable year-round. With their prompt response times, transparent communication, and dedication to providing detailed, fair estimations, Semper Fi Heating & Cooling embodies the trust and reliability you seek in a professional service provider.

Frequently Asked Questions About Plumbers in Phoenix

How can I find a reliable plumber in Phoenix?

Start by asking for recommendations from friends, family, or neighbors who have had plumbing work done recently. Online review platforms like Yelp and Google Reviews can also provide insights into a plumber’s reliability and customer service. Look for plumbers with high ratings and positive feedback, especially from customers who had similar plumbing issues to yours.

What should I do if I have a plumbing emergency in the middle of the night?

You’ll need to find a plumber that offers emergency plumbing repairs, it’s a good idea for homeowners to have the contact information of a trusted emergency plumber saved in your phone or easily accessible at home. When facing a plumbing emergency, such as a burst pipe or severe leak, shut off the main water supply to your home to minimize damage, and then call your emergency plumber right away.

What should I expect to pay for plumbing services in Phoenix?

The cost of plumbing services in Phoenix can vary widely depending on the job’s nature and complexity. Minor repairs might cost as little as $100 to $300, while more extensive work, like a full pipe replacement or a new water heater installation, could run into the thousands. Remember, quality and reliability should also play a significant role in your decision.